Those who have been reading my posts and watching my videos (you have my sympathy) will know that alongside constructing this computer I’ve also been busy renovating a house I bought almost a year ago. This is mostly why there’s been a lot of theory and design going on for the relay computer and not much construction … I haven’t actually had anywhere to do the construction … until now that is.
When I first viewed the house the upstairs back room was just screaming out to be made in to a workshop for my electronics hobby … although in the end I had to settle for workshop/guest room being as the house isn’t solely mine. Anyway, with that back room now fully decorated I was keen to get a workbench of some kind in there. The space I had to work with was as follows:
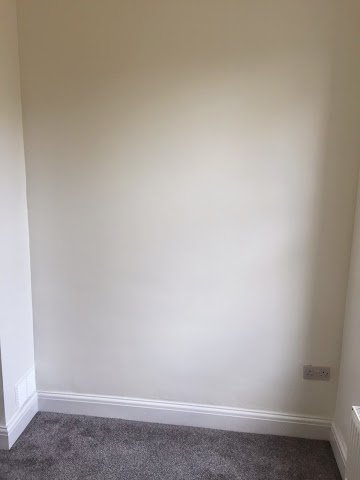
As you can see it’s not the biggest space and to make things even more complicated there’s only slightly more than 30cm depth available on the left (the door is just off picture to the left) and 50cm depth on the right (where there’s a window and a radiator). I’d be happy with a bench that is 50cm deep but, of course, I can’t have it overhanging in to the door way so I’d need a bench that starts at 50cm deep but goes back to 30cm at the left hand side.
I spent quite a bit of time drawing up various designs for a bench although all of them based around the concept of a work top that sweeps from deep to, erm, not-deep. I wanted the bench top to be similar height to a kitchen worktop, somewhere around 90cm high, so that I can either stand or sit at the bench depending what I’m doing. I also wanted plenty of room for storage of boxes and the like. In the end I was veering towards a design that would have a kitchen worktop fixed to the wall with supporting legs along the front and then probably a couple of shelves mounted to the wall. That said though I wasn’t particularly keen to drill in to the freshly plastered and painted walls I’d had to shell out for a month beforehand. Possibly some kind of free standing bench then?
As it happened I had a moment of inspiration at IKEA (while shopping for some house tat). I was wandering through the maze of furniture (the first bit in IKEA before the restaurant and emporium of crockery) and happened upon the IVAR range of shelving. It’s a fairly plain and simple pine shelving system … quite reasonably priced … but most importantly comes in two depths … 30cm and 50cm. In the time it took me to negotiate my way through the IKEA marketplace and in to the warehouse I had the finished design in my head and picked up a trolly and went hunting in the isles for the bits of IVAR that I needed.
The following day I put the IVAR shelves up (as IKEA intended) to see if my design will still be plausible. This is what it looked like:
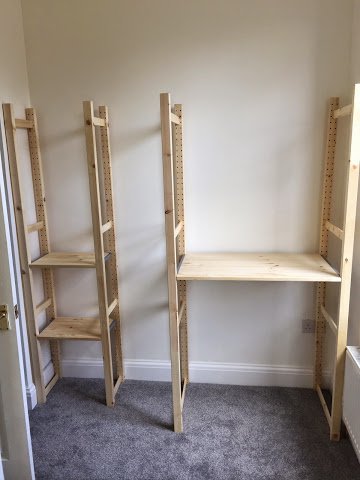
Generally the shelves look to fit in OK although I had miscalculated the position of the radiator in my head so the right hand shelves rest against the radiator rather than the wall as originally intended. It’s worth mentioning that the shelves as you see them here are incredibly unstable and that’s because they need at least three shelves in place to hold the sides steady and then following that you add a cross brace to give it further stability.
With the basic frame in place it was time to get hacking … and I can only apologise to Ingvar Kamprad for what I did to his IVAR shelves …

If you compare the two pictures before and after you can see that I chopped down the side frames removing the front upper half and two cross beams from each side. This gives me my rough bench design that I was after. To give the whole thing better stability I added small metal corner brackets at each point where the worktop meets a side post and the resulting structure is pretty stable. I did all the modifications on a flat laminate floor downstairs and with a spirit level I was able to ensure everything was straight and true as possible. Finally I added some wooden brackets at the top of each post to support a shelf … positioning it carefully so that when the shelf is in place I won’t be knocking my head on it all the time.
The final task was then to add the shelf (which ties the two units together) and add a ‘bridging’ piece of shelf in the middle to create one long work top. This bridging piece was just an IVAR shelf that I chopped down and sculpted a curve in to. With that all done and with a few accessories thrown in the bench ends up looking like this:
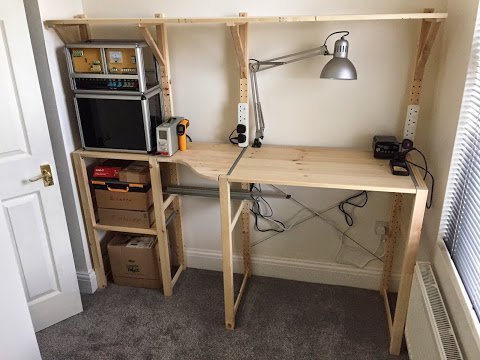
The relay computer as it currently stands sits snuggly (by accident rather than by design if I’m honest) in the left hand unit and then on the right hand unit I’ve got two 4-way power outlets and a lamp. The only thing missing really was a good surface to work on. I didn’t want to leave it with bare wood as I’d end up burning it in no time when soldering or I’d have trouble loosing fiddlier components in the pattern of the wood. In the end I settled on a blue anti-static mat which solved both issues.
So in the end I’m quite happy with the resulting workbench. It’s fairly sturdy, I didn’t have to trash the walls to put it in and I’ve got enough room to work and store things. Here’s a final picture of the workbench ‘in use’:
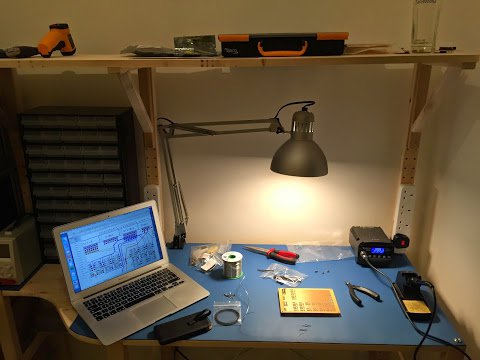
… and yes, finally, what you see here are the beginnings of the instruction register which means construction is moving again and my next post will be about this very card.