I was going to spread the fitting of the laser cut parts to the lower enclosure over a couple of evenings but in a fit of geeky excitement I ended up doing it all in one evening. Fortunately I didn’t damage anything in my ‘rush’ (although I had to accept a few niggles) and it went something along this lines of this …
First job was to fit the panels in to the front and rear door frames. As is often the case with these things I had this picture in my head of the panels popping straight in the frames with no fuss … a picture which always seems to differ substantially with the real life experience. To say this thing was a tight fit is an understatement. I started off with a U shaped frame and the idea was to slide the panel in from the top but as the panel moves further down it builds up more and more friction resistance in the plastic panel holder strips. In the end I took the frame apart and built it back up again around the panel but even with this it certainly took some considerable arm strength to persuade it to go together. After much perspiration the panel was in and looks like this:
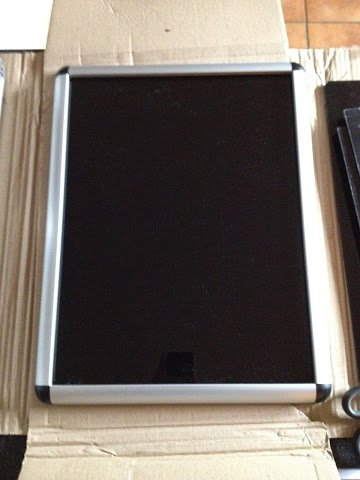
The front door (pictured above) ended up as intended but with the matching back door I found the panel was a little loose after re-assembling the frame and this seemed to be because the panel wasn’t quite being gripped by the upper and left hand frame inserts. I tried sliding the panel within the frame up and to the left to centre the panel within the frame but it’d apparently take more force than I could muster so I’ve left it as is. There’s a slight rattle there but nothing too bad … I might take it apart again later and reset the panel but I’m not sure how many goes I get on the self tapping screws that hold the frame together before I strip the threads.
With a little ‘panel experience’ under my belt I moved on to the side panels for the main enclosure itself (aware that getting this one wrong might require quite a bit more rework). Fortunately, because these panels are much smaller, they slipped in to their frames without too much resistance. With both panels in place I was finally able to secure the rear half of the enclosure to the front half. This required tightening three screws up a bit at a time until the rear half met with the front and secured the panels and everything together. It’s a bit of an odd design this because it means if I ever need to replace the side panels I’ve got to split the enclosure in half but it’s a necessity brought on by my wanting to use the curved aluminium profile on the case edges which meant I had to be a bit sneaky with where I placed the screws. With the front and rear doors fitted the enclosure ends up looking like this:
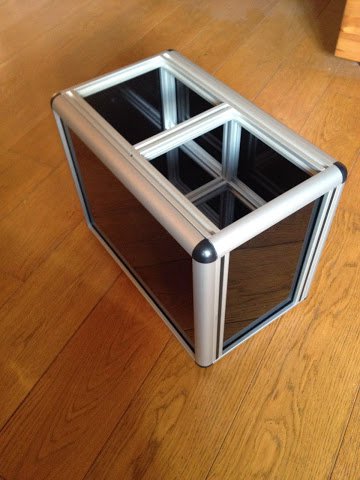
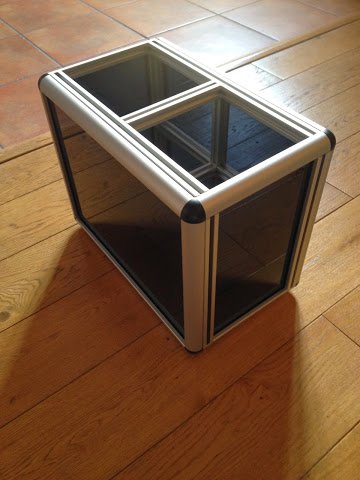
On the right hand picture you can better see the transparency of the smoked acrylic panels with the floor boards showing through. Unfortunately, as with the front/rear doors, one of the side panels is a little loose in the frame so has a slight rattle when prodded. I’m more inclined to leave this one be as taking the enclosure apart to reseat the panel would be a thorough pain.
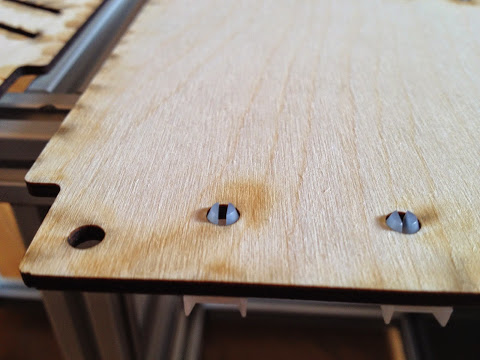
Moving on … next up is the plywood card bay ceiling/floors. I’d already purchased the card guides a while back so I just had to dig them out and snap them in to the plywood … all 40 of them (5 per board, 2 boards per bay, 4 bays in total). With the card guides attached a ceiling and floor board looks like this:
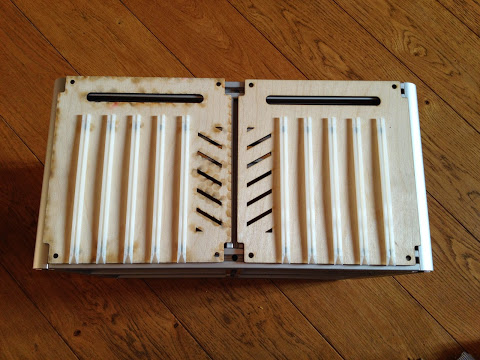
Somehow, despite following the data sheets for the card guides closely, the two holes for the guides aren’t quite far enough apart (by half a mm or so) so the card guides have a little upward flex in them (around 1mm). I considered widening the rear hole, which funnily enough is already elongated anyway to allow for variation, but decided to leave things as they are and the slight flex doesn’t appear to cause any problems.
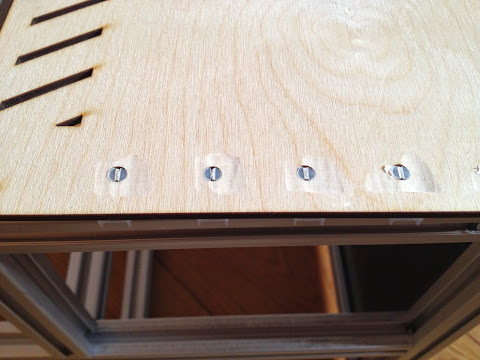
Before fitting the floor/ceilings to the enclosure I needed to address a small design issue. Actually, unlike other gaffs I’ve made in the design, this was one I was aware of from the beginning and had already accepted a work around. The problem is that the card guides stand proud of the board underside when fitted so that they would foul the aluminium profile they’re fitted against … here’s a picture that shows the problem:
Still, nothing the (sloppy) application of a Dremel can’t sort out (with the sanding drum attached) …
With that little issue sorted I could finally fit the eight boards to the enclosure. This was done using M4 screws and the special/magic bolts designed for use with the aluminium profile. These special bolts slot in sideways in the profile grove and then as you begin to tighten them with the screw they rotate 90 degrees thereby locking in to place. Here’s a close up of a ceiling and floor attached in one of the card bays (you can also see one of the bolts mentioned above in the top right of the picture - here it’s acting as something the magnet in the doors can latch on to (the aluminium itself is not magnetic of course)):
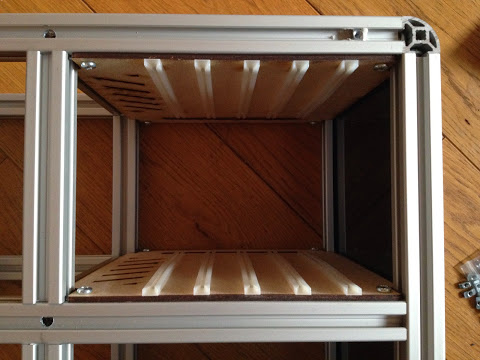
Incidentally, to get the alignment right I secured the floor board as central as possible and then loosely attached the ceiling, inserted some cards and then adjusted and tightened the ceiling screws once everything looked lined up.
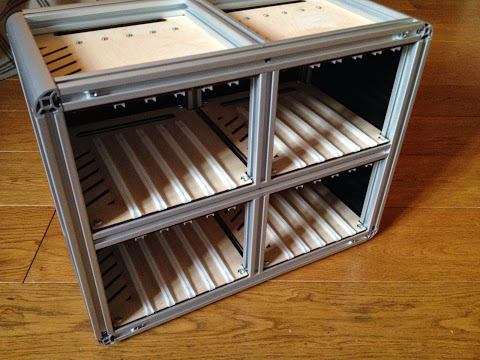
So, that’s all of the lower enclosure laser cut parts fitted. Here’s a couple of pictures with all floors/ceiling boards in place … first from the rear and then from the front (with rear door fitted):

There’s not too much to do on the lower enclosure now … I do need some way of attaching the card backplane(s) in place and I’ve got Meccanno in mind. I’ve found a website that sells individual Meccanno ‘spare’ parts so should be able to use them to form a bracket that will be sturdy enough to take the force of cards being inserted in to a backplane. Other than that I just need to run some ribbon cable around the place but I’ll do that as I go along. At some point (when I’m feeling flush with cash) I’ll finish off the upper enclosure design and get the aluminium profile and laser cut panels ordered but meanwhile it’s time to get back to the construction of the computer itself and the lower enclosure will now be able to hold all of the cards I’ve got planned.