Sorry, I will try to rain in the terrible punning post titles.
This time I wanted to share the thoughts and ideas I’ve been having around building a case to hold my computer when it’s eventually complete. I wanted to use a material that would be easy to handle and work with but also one that would produce a nice looking result. I was initially drawn to using wood or possibly even laser cut plywood but in the end I settled on aluminium profile as its sturdy, easy to assemble and, I think, looks really great. In addition to this it’s available in a large variety of sizes, shapes and there’s plenty of fixtures and fittings available for it.
If you haven’t come across it before, aluminium profile is basically created by extruding aluminium through a die to produce bars of varying lengths. The clever thing is that the dies are shaped so that channels are produced that can fit bolts or screws to allow profile to be joined together or for fittings to be attached. Also, the cross section is designed to have maximum strength but minimal weight therefore a given length of profile is very strong but very light. There’s a quite a few different manufacturers of profile, each with different cross section designs, but I’ve gone for the Bosch Rexforth range as I found they had the best selection of connectors and fittings.
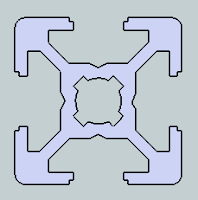
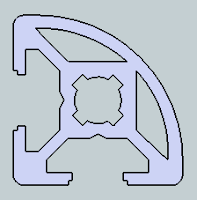
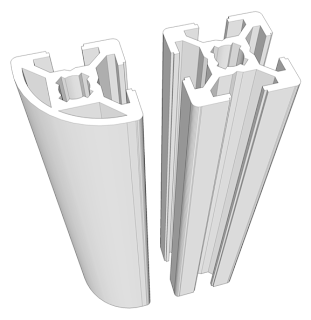
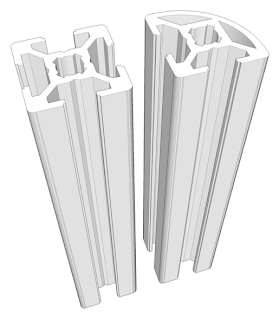
One of the key things with aluminium profile is to choose a series (often determined by the width of the profile cross section or sometimes by the slot size) and then stick to it. This is because all the parts in a series are designed to work perfectly with each other but not necessarily with parts from other series. As the total weight of my computer won’t be all that great I’ve gone for the lightest smallest series which is based on a cross section of 20x20mm with a 6mm slot. A cross section of the 20 profile along with a 20R profile which has a rounded edge looks like this:
and when extruded to 100mm looks like this (again, using the excellent SketchUp software):
There’s many ways of joining profile together but by far the simplest, and cheapest, is using a self tapping T25 core screw. This often requires drilling a hole through the profile so that a torx screwdriver can be inserted through the centre of the profile to tighten the screw but fortunately aluminium is very easy to drill.
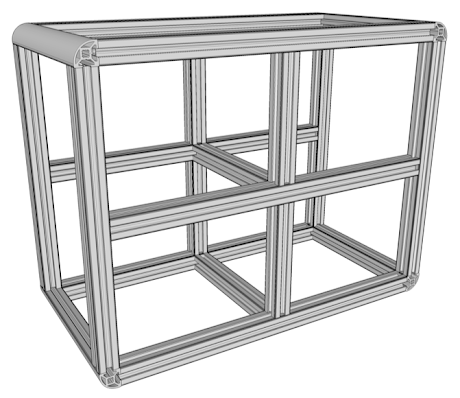
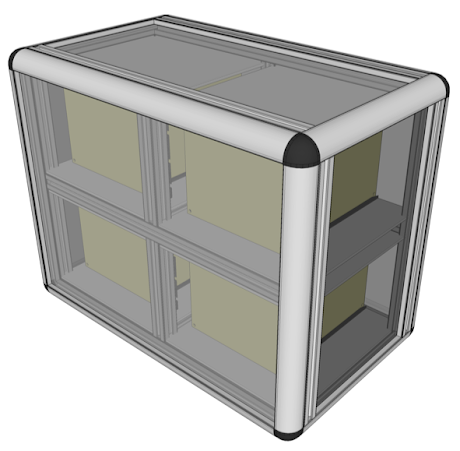
By the time the computer is finished there’ll be four backplane cards which can each carry up to five cards. Based on this the basic frame of the enclosure looks like this:
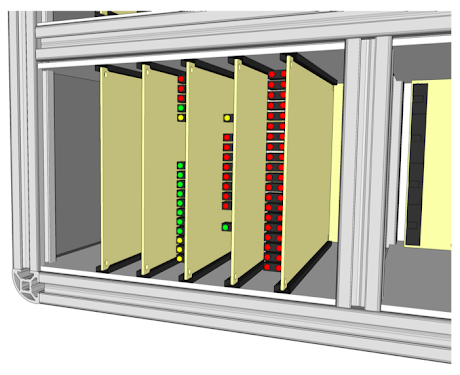
Each quarter of the frame then has a board on the floor and ceiling (probably made of Diabond aluminium composite for strength and lightness) to which PCB guides are attached. The backplane is then secured at the back of the frame and the cards are slotted in from the front. This is what it would look like:
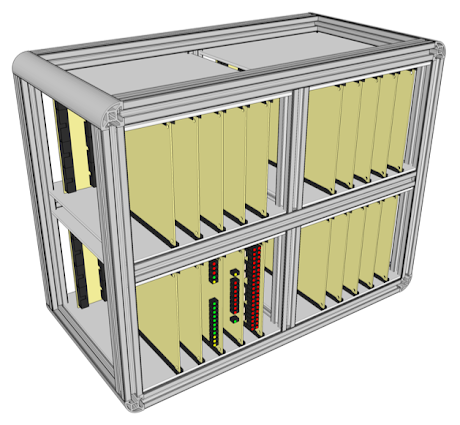
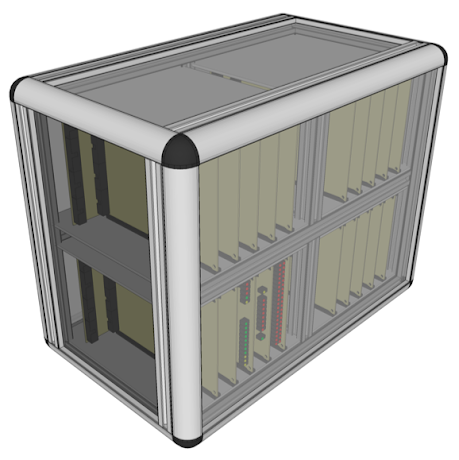
With all four quarters fitted with floor, ceiling, backplane and cards it would look like this:
To finish the enclosure off the sides are fitted with smoked acrylic panel. This sits in the recesses of the profile and is cushioned by a rubber strip. For the front and back of the enclosure there is a smoked acrylic panel retained by profile that will be secured by magnets slotted in the profile recesses along the joining faces. This allows easy access to the cards when needed whilst allowing the card LEDs to be visible when the panel is attached. Here is a picture of that front panel detached:
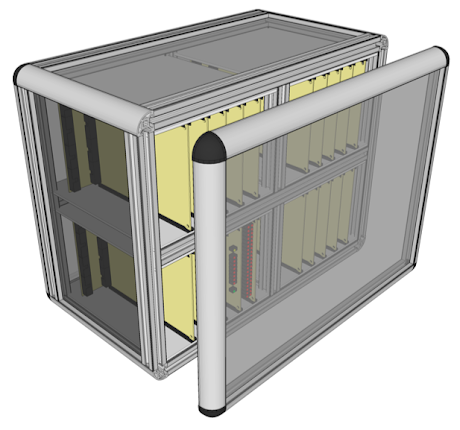
and finally here is the complete enclosure with front and rear panels attached:
The enclosure above will actually form one of three units … this being the card unit. Additionally there will be a switch unit which holds the main control switches and then a display unit which will contain the control bus displays and diagnostic switches along with the main data/address bus and status displays. These additional units only exist in my head at the moment but I’ll start transferring them in to SketchUp and then share them in a future post.